【Unity】VideoPlayerをGameObjectが非アクティブでも再生する方法
Post : 2022/10/9 Update : 2022/10/9
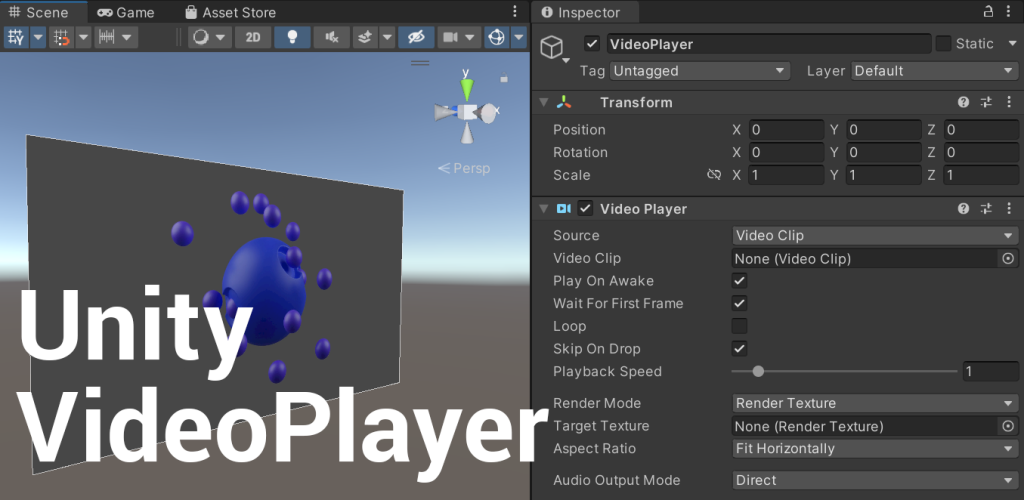
Unity標準のVideoPlayerではアタッチされているGameObjectやその親が非アクティブになっていると再生だけでなく読み込みの処理も止まってしまい、また、アクティブ状態が切り替わるたびに読み込み処理が始まってしまったり、読み込み時のちらつきが気になったのでその対処方法。
動的にGameObjectを生成後、VideoPlayerを追加する流れです。
VideoPlayerを制御するVideoControllerクラスに書いてきます。
VideoPlayerを使うために UnityEngine.Videoをusingに追加
using System.Collections;
using System.Collections.Generic;
using UnityEngine;
using UnityEngine.Video;  //追加
GameObejectを生成して、AddComponentでVideoPlayerをアタッチ!
public class VideoController : MonoBehaviour
{
void Start()
{
GameObject go = new GameObject(); //GameObjectを生成
var vp = go.AddComponent<VideoPlayer>(); //VideoPlayerを追加
}
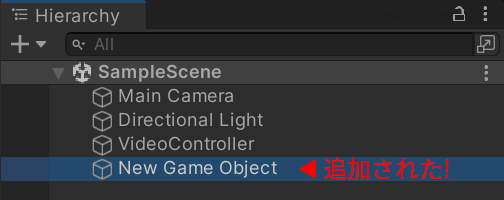
}Editorを再生するこんな感じで追加されたと思います。
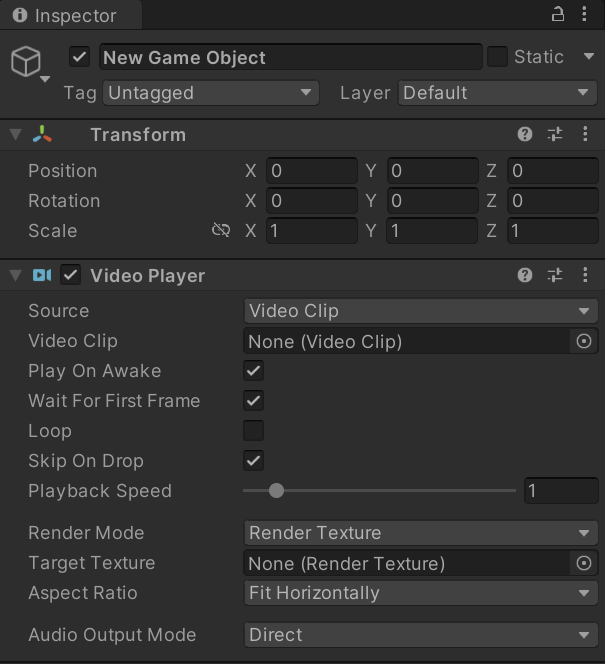
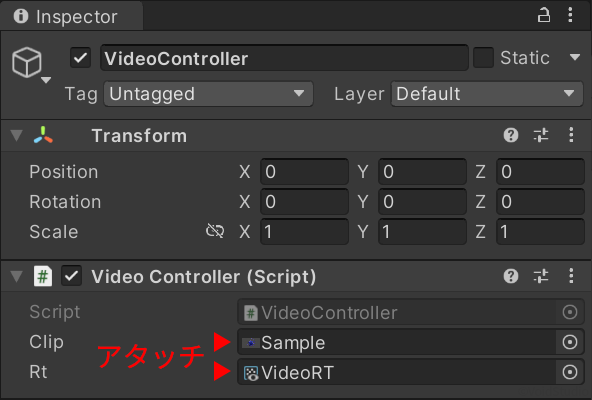
動的に追加しているのでVideoClipやTarget Textureが空っぽだったりするので、入れられるようにシリアライズフィールドで追加できるように変更します。
[SerializeField] VideoClip clip; //エディタからVideoClipが選択できるように追加
[SerializeField] RenderTexture rt; //エディタからRenderTextureが選択できるように追加
void Start()
{
GameObject go = new GameObject();
var vp = go.AddComponent<VideoPlayer>();
vp.clip = clip; //VideoClipを追加
vp.targetTexture = rt; //RenderTextureを追加
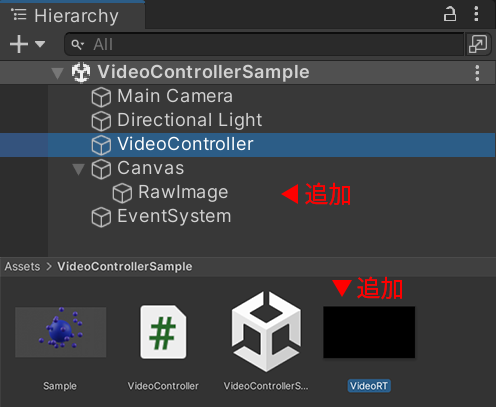
}エディタでRawImageとRenderTextureを追加して先ほど変更したVideoControllerのclipとrt変数にアタッチ!
複数使う場合
Scene中で複数使用するとこんな感じでヒエラルキーに同じ名前でかつ大量にGameObjectが生成されます。
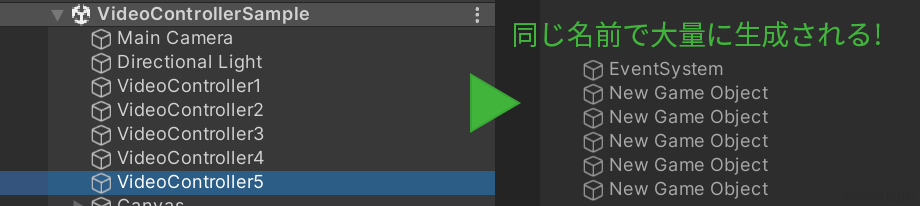
これを解消するためにVideoCotrollerを修正します。
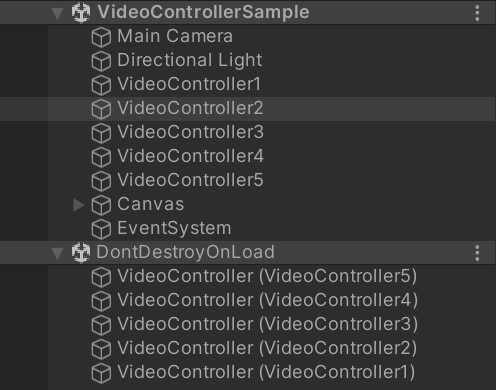
void Start()
{
    GameObject go = new GameObject("VideoController (" + this.gameObject.name + ")");   //名前を付ける

    var vp = go.AddComponent<VideoPlayer>();
    DontDestroyOnLoad(go);     //追加

    vp.clip = clip;
    vp.targetTexture = rt;
}
こんな感じでVideoPlayerに名前が付きかつヒエラルキーが見やすくなりました。
実際に使うときはPlay,Pause,Stopが外部からアクセスできるようにVideoPlayerをメンバー変数で持って、下のようなpublic関数を追加して使用してます。
using UnityEngine;
using UnityEngine.Video;

public class VideoController : MonoBehaviour
{
    [SerializeField] VideoClip clip;
    [SerializeField] RenderTexture rt;

    VideoPlayer vp;
    void Start()
    {
        Debug.Log("Start");
        GameObject go = new GameObject("VideoController (" + this.gameObject.name + ")");
        DontDestroyOnLoad(go);

        vp = go.AddComponent<VideoPlayer>();
        vp.clip = clip;
        vp.targetTexture = rt;
    }

    /// <summary>
    /// 再生
    /// </summary>
    public void Play()
    {
        vp.Play();
    }

    /// <summary>
    /// 一時停止
    /// </summary>
    public void Pause()
    {
        vp.Pause();
    }

    /// <summary>
    /// 停止
    /// </summary>
    public void Stop()
    {
        vp.Stop();
    }
}